I was browsing solar panel kits online to see which one I could easily install on a typical shed without needing to buy a bunch of extra parts.
I came across the Renogy 200W 12V Monocrystalline Solar Starter Kit and realized it met my needs while costing less than similar systems.
The Renogy 200W Solar Starter Kit is the best solar panel kit for a shed because it supports multiple battery types and includes the proper cables and brackets for installation. Its charge controller also supports the optional BT-1 module that will display data via Bluetooth to your smartphone.
| Pros | Cons |
|---|---|
| Tried and tested (4.7/5 stars on Amazon with 4,000+ ratings) | Doesn’t come with an inverter or battery |
| Water-resistant junction box & MC4 cables | PWM charge controller |
| Z-bracket mounting system included | Not ideal for significant power needs |
| Can use with 12V or 24V gel, AGM, flooded, and lithium batteries | The charge controller doesn’t have an LCD screen |
The Renogy Starter Kit is best for people who want nearly an all-in-one solar panel system. With a properly sized battery and inverter (if needed), this kit provides a reliable power supply to your shed.
The good thing is that it’s a DIY package. In case you want to install it yourself or engage a professional for the job – either way – you’re good to go.
You can check the price of this kit on Amazon (affiliate link), but I recommend reading on for more insights on this kit as well as comparisons to similar ones.
Renogy 200 Watt 12 Volt Monocrystalline Solar Starter Kit – Overview

This kit is designed in a way that makes it easy to install and run your solar energy system. Without a battery connected, the kit weighs 36.6 pounds.
The Renogy solar kit includes every necessary tool you need for the proper solar panel setup:
- 2x Renogy 100W 12V monocrystalline solar panels
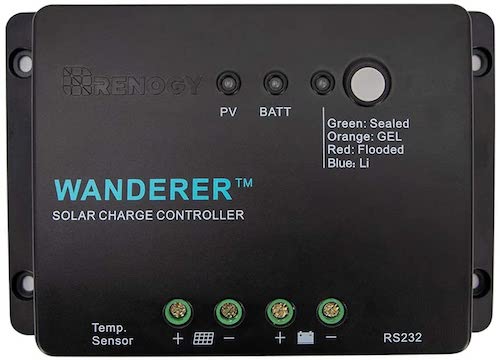
- 1x 30A PWM Wanderer charge controller
- 1x 20ft 10AWG MC4 adaptor kit (to connect the solar panel to the charge controller)
- 1x 8ft 10AWG tray cable (to connect the charge controller to the battery)
- 1x pair of MC4 branch connectors
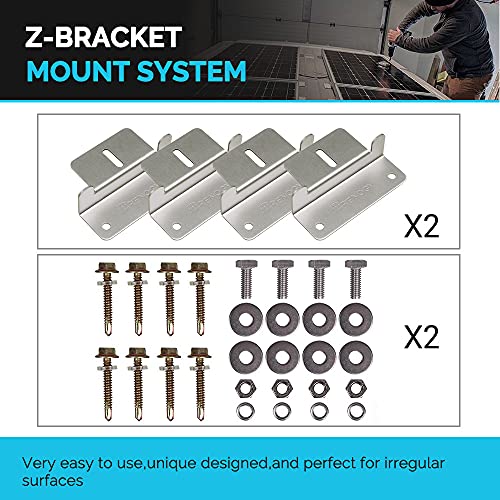
- 2x sets of Z-brackets
With a simple 100Ah battery and inverter (not included), the starter kit can provide power to small appliances and devices like fans, bulbs, LED lights, and recharging your phones – as well as bigger power demands such as TVs, laptops, and refrigerators.
The two 100-watt panels have monocrystalline cells, which are more efficient than the similar polycrystalline cell type.
The Renogy panels can be used in different kinds of off-grid applications that include 12 and 24-volt setups.
This means that you can use 12V or 24V batteries depending on your power requirements.
Similar: Monocrystalline Vs. Polycrystalline Solar Panels – What’s the Difference?
Unique Features of the Renogy 200 Watt Starter Kit
- A corrosion-resistant aluminum frame – Designed for extended outdoor use. This allows the panels to last for decades.
- A TPT solar back sheet
 – Ensures smooth performance over a long period. A solar back sheet is the last layer at the bottom of a solar panel. It prevents degradation, ultraviolet radiation, and penetration of humidity or vapor.
 - IP65 rated junction box – Provides complete protection against environmental particles, scratches, and low-pressure water jets.
- IP67 rated MC4 cables – This rating is even higher in water resistance than the junction box.
- 25-year power output warranty and 5-year material and workmanship warranty
Solar Panel Specs – Renogy 100W Monocrystalline
The package includes two 100W monocrystalline solar panels. Below are the specifications for each solar panel:
| Solar Panel Model | Renogy 100W Monocrystalline (RNG-100D) |
|---|---|
| Dimensions | 47.3 x 21.3 x 1.4 in |
| Weight | 16.5 lbs |
| Cell Type | Monocrystalline |
| Frame Material | Anodized aluminum alloy |
| Optimum Operating Voltage (Vmp) | 18.9V |
| Optimum Operating Current (Imp) | 5.29A |
| Open Circuit Voltage (Voc) | 22.5V |
| Short Circuit Voltage (Isc) | 5.75A |
| Connector Type | MC4 |
| More Info | Manual |
Monocrystalline solar cells are a very popular option on the market due to their efficiency.
Here are some other reasons why monocrystalline solar panels stand out among the others:
- Monocrystalline solar cells are made from a very pure form of silicon. This enhances their efficiency in the conversion of sunlight into energy.
- They are not large yet powerful. These panels are the most space-efficient form of silicon solar cells.
- Their surfaces are optimized for high efficiency which makes them useful even on cloudy days.
Can You Use an Inverter With a Solar Panel?
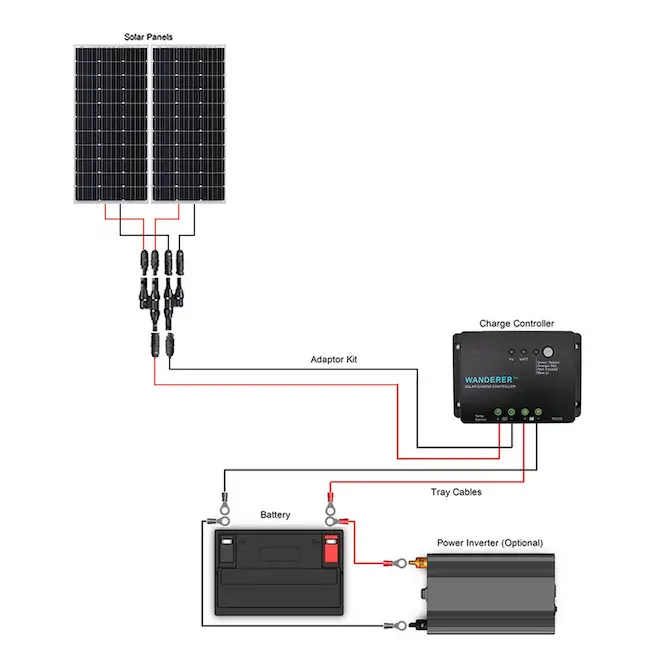
You can use an inverter with a solar panel but this requires a charge controller, fuse box, and battery to function properly. In the following order, connect the inverter, charge controller, and battery to the fuse box. Then, connect your solar panels to the charge controller to complete the setup.
Later in the article, I’ll show you a video on how to connect each component together in the proper order with the proper wiring.
Renogy Wanderer 30A Charge Controller – Specs & Details
The Wanderer charge controller is versatile as it can connect to several battery types. Below you’ll find its basic specifications.
| Charge Controller Model | Renogy Wanderer 30A |
|---|---|
| Battery Type/Compatibility | Sealed, gel, flooded, and lithium |
| Nominal System Voltage | 12V DC |
| Battery Compatibility | 12V, 24V |
| Max PV Input Power | 400W |
| Dimensions | 6.5 x 4.3 x 1.8 in |
| Charge Controller Type | PWM |
| More Info | Manual |
The Wanderer charge controller is incorporated into the Renogy Starter Kit to prevent overcharging the battery.
The charge controller also prevents the return of current from the battery to the panels – a phenomenon known as battery drain or leakage of current.
When the battery voltage reaches a pre-calibrated level, the Wanderer opens the circuit to stop the charging of the battery from the panels.
It also blocks the reverse flow of current from the battery system to the solar panels. This improves the efficiency and longevity of the battery.
For comparison, the Renogy Rover 20A Li MPPT charge controller is also found in other Renogy solar kits.
What’s Unique About the Renogy Wanderer Charge Controller?
- You can expand your system up to a maximum of 400W of solar.
- It compensates for temperature changes in the battery, automatically corrects charging and discharging parameters, and improves the battery’s longevity.
- It has LED indicators that keep you updated on the charge controller’s status.
- It’s compatible with sealed, gel, flooded, and lithium batteries.
- The controller is also equipped with comprehensive self-diagnostics and electronic protection functions to prevent it from damage during installation or system faults.
- You can get an optional BT-1 Bluetooth Module
 (Amazon) to manage and monitor power consumption and output.
The noticeable downside to the wanderer charge controller is that it doesn’t have a meter to show voltage or current.
Purchasing a meter or upgrading charge controllers is an option for those that would prefer to know the exact numbers coming from their system.
Renogy has a 200-watt solar kit nearly identical to the one being reviewed today, except it comes with a Rover MPPT charge controller with a monitoring screen. Check it out on Amazon here .
.
The Rover is a higher-quality charge controller than the Wanderer, but the price of the Rover solar kit is over $100 higher than the Wanderer version.
In my opinion, the price point doesn’t justify the included products because the items in both kits are identical except for the controller.
200W Solar Panel Kit Comparison
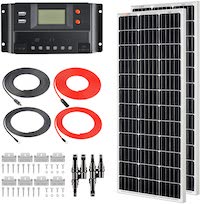
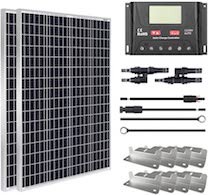
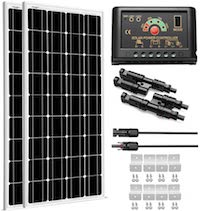
| Solar Panel Kit | Renogy 200W 12V Solar Starter Kit | RICH SOLAR 200W 12V Solar Kit | HQST 200W 12V Solar Panel Kit | SUNGOLDPOWER 200W 12V Solar Panel Kit |
|---|---|---|---|---|
 |  |  |  |
|
| Amazon Rating | 4.7/5 (4,000+ ratings) | 4.4/5 (200+ ratings) | 4.4/5 (50+ ratings) | 4.3/5 (40+ ratings) |
| Additional Accessories | 1x Charge controller 1x 20ft 10AWG solar panel & controller connector cables 1x 8ft 10AWG tray cable 2x Sets of Z-brackets 1x Pair of branch connectors | 1x Charge controller w/ LCD display 2x 20ft 10AWG solar panel & controller connector cables 2x 10ft 10AWG controller & battery connector cables 2x Sets of Z-brackets 1x Pair of branch connectors | 1x Charge controller w/ LCD display 1x 20ft 10AWG solar panel & controller connector cables 1x 8ft 10AWG controller & battery connector cables 2x Sets of Z-brackets 1x Pair of branch connectors | 1x Charge controller 1x Pair of solar panel connector extension cables 2x Sets of Z-brackets 1x Pair of branch connectors |
| Charge Controller Features | - PWM (30A) - Compatible w/ 12V or 24V batteries - Compatible w/ bluetooth module | - PWM (30A) - LCD screen - Compatible w/ 12V or 24V batteries | - PWM (30A) - LCD screen - Compatible w/ 12V or 24V batteries | - PWM (20A) - Compatible w/ 12V or 24V batteries |
| Price (via Amazon) | $297 | $250 | $250 | $250 |
Clearly, these four kits are nearly identical. They come with nearly all the same things. The biggest difference between these kits is their charge controllers.
Comparing Charge Controllers
The SUNGOLDPOWER charge controller is rated for 20 amps and the remaining brands all have 30A controllers. Since the 30A controllers are capable of handling more current, the SUNGOLDPOWER kit doesn’t make the cut.
The remaining charge controllers are very similar. I wanted to find more information on each one, so I looked them up.
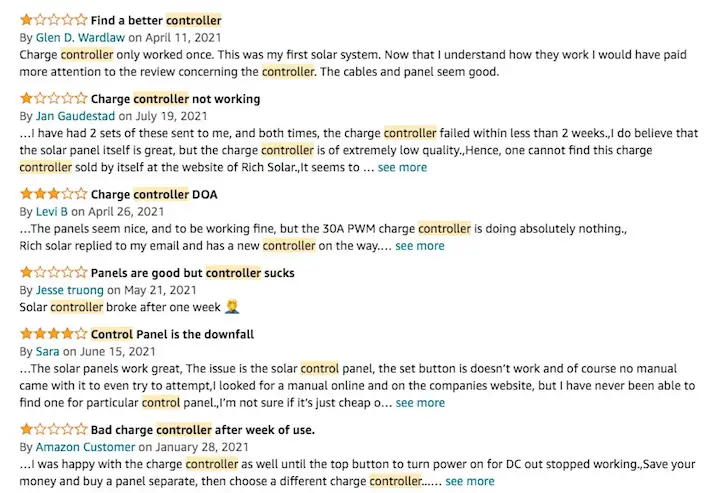
Renogy and HQST had individual product listings for their controllers but RICH SOLAR did not. Their Amazon store and website did not show the same one that is pictured in the kit.
This, along with several negative Amazon reviews specifically regarding the kit’s charge controller made it obvious that this system could not compete with HQST and Renogy.
Now, with HQST and Renogy remaining, the biggest visual difference between the two is the HQST controller’s LCD screen. The Renogy Wanderer doesn’t have a screen, so I compared the two systems from Amazon.
The Renogy Wanderer has a rating of 4.4/5 based on over 2,000 ratings. The HQST 30A PWM controller has a 4.3/5 rating from over 500 total ratings.
From the customer comments on Amazon, they both have issues with lithium-ion battery charging.
The HQST controller has an advantage as it can display data through its LCD screen.
With the HQST having a better charge controller than the Renogy package as well as a lower price, there are two things that make me believe that the Renogy kit is the overall better choice.
First off, the Renogy Starter Kit has thousands of Amazon ratings averaging a 4.7/5, whereas the similar HQST kit has far fewer ratings with a 4.4/5 average.
Secondly, the Renogy controller has the ability to connect to an optional BT-1 Bluetooth Module (link to Amazon).
This allows you to use an app on your phone (seen below) that shows you all the data from the charge controller, including the battery, solar panels, voltage, amperage, and much more.
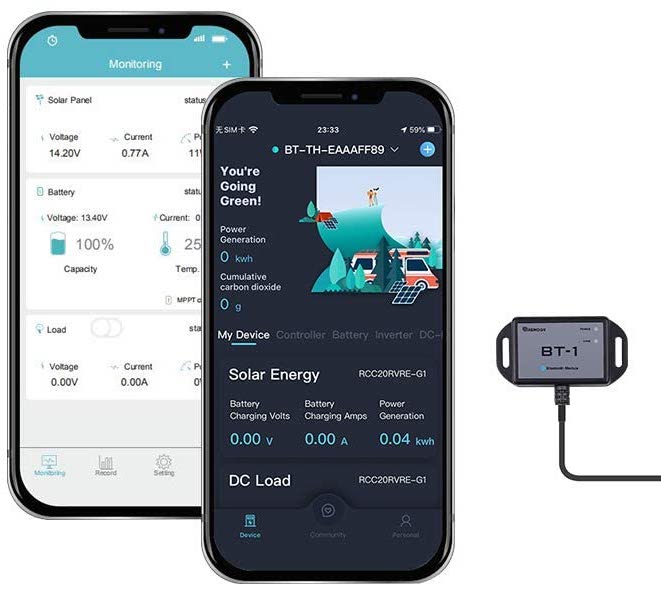
Although this comes at an additional cost, the BT-1 module gives you all of the data you need on your phone.
The HQST charge controller does not have this option, which limits its capabilities.
Verdict – HQST vs. Renogy 200W Solar Panel Kit
Overall, with a higher number of ratings, a higher average Amazon rating, and the option to have all data available via your smartphone from the BT-1 module, the Renogy 200W Starter Kit is the option I would choose for my shed.
The ratings tell me that the Renogy kit can be trusted to work as it says, and the lack of reviews and ratings from the HQST kit doesn’t give me the confidence to fully trust the product at this point in time.
Although the Renogy kit with the BT-1 module will cost about $90 more than the HQST kit, the added value from the BT-1 gives me confidence that I can reliably use and maintain my kit for several years.
Additionally, if I wanted to upgrade my system to a Renogy MPPT charge controller that will take in more solar and charge batteries more efficiently, the BT-1 module will still be able to work with it, as it is compatible with several Renogy controllers.
Installing the Renogy 200W Solar Starter Kit
There are Z brackets to help hold the panels on the surface where they are to be mounted as well as screws, nuts, and bolts to secure the panels in place.
The entire setup is pretty much a DIY package. A guide is included, along with all the needed hardware. The pre-drilled holes on the back of the panels make for easy, fast, and secure mounting.
Even though installation will take time, it will save you installation costs from a third party.
Ideally, with little to average knowledge of electronics and connectivity, you can sort it out effectively.
There are several videos on YouTube on how to install solar, but the following video shows how to install a Renogy kit that is almost identical to the one I am reviewing now on an RV.
Although it’s not installed on a shed, it will give you a good idea of the tasks involved to put it together.
On the other hand, you could hire professionals to do the installation if you’d like as well.
Renogy also has a PDF installation guide for their solar panels that you can read here: Installation Guide for Photovoltaic (PV) Modules . This can be handy if you need exact specifications before installation.
Similar: Solar Panel Installation – Step-By-Step for Home and RV
What Do You Need for Solar Power in Your Shed?
The main components you’ll need for solar power in your shed include solar panels, a charge controller, a fuse box (for DC appliances), an inverter (for AC appliances), and a battery. Once these are connected in the right order with properly gauged wiring, the system is complete.
The following video shows exactly how to connect each of the previously mentioned parts together. I forwarded the video to where the wiring begins:
The charge controller used in the video is different from the one that comes with the 200W Renogy kit, but it shares the same basic connections.
The Renogy kit does not come with a fuse box, battery, or inverter. These items are essential for off-grid power.
One of the benefits of the kit not including these components is the power to choose which inverter, battery, and fuse box best suits the power needs of your shed.
Another way to gather all of these components is through a solar generator or portable power station. A solar generator has a charge controller, inverter, and battery already within it. It has DC and AC ports and only requires solar panels to function properly.
I have an article that compares a DIY solar power system to solar generators to give you an idea of which may be better for you. Find the article here: Solar Generator vs Battery – Which Is Ideal? .
.
Kit Expansion– Customizing the Solar Panel Setup for Your Shed
In any DIY solar-powered system, there will be some (or a lot) of room for customization.
In essence, you could add batteries as you deem necessary or increase the amount of power you store by adding more solar panels to what you have originally packed in the Renogy starter kit.
For example, you could extend the solar panels up to 400 watts from the original 200 watts by adding two extra 100-watt panels.
Renogy sells a kit like this and it is essentially the same as the 200W starter kit but with two additional solar panels. You can find it here on Amazon (affiliate link).
With this, you must be sure that your roof is capable of bearing the weight of the extra panels before mounting them.
In total, four Renogy monocrystalline panels will weigh about 70 pounds.
Renogy alone has dozens of additional kits to choose from. They have all sorts of charge controllers and solar panel configurations depending on how much power you need. You can browse all of their kits on Amazon here .
.
Complete Solar Power Kits for Your Shed
If you’re looking for complete solar kits with all necessary components for your shed, they should include some (or all) of the following:
- Solar panels
- Fuse box
- Inverter
- Battery or batteries
- Proper wires/cables
- Mounting brackets
Shop Solar Kits has several of these off-grid systems available on its website. You can browse their complete kits here (affiliate link).
An example of one of their kits is pictured below. You can clearly see that this kit has several more parts than the Renogy kits.
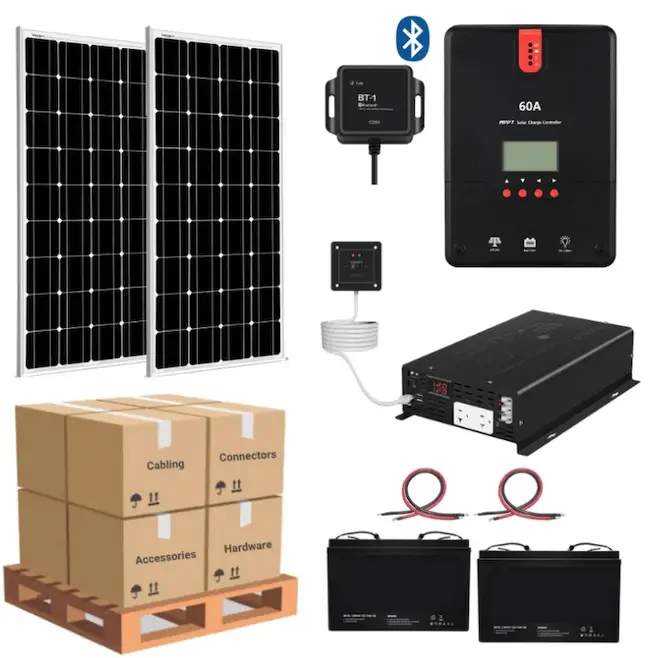
Here’s what this kit includes:
- 1 x 2,000W 12V Pure Sine Inverter – 120V Output
- 2 x 200 Watt Monocrystalline Solar Panels (12V)
- 2 x 12V Batteries – Choice of AGM or Lithium Batteries
- 1 x 60A MPPT Solar Charge Controller
- 1 x 10AWG Solar Extension Cables PV, approx. 50ft
- 1 x 4AWG Inverter Cable, approx. 3ft
- 1 x 4AWG Inverter Cable, approx. 1ft
- 1 x 4/0AWG Inverter Cable, approx. 3ft
- 1 x 4/0AWG Inverter Cable, approx. 1ft
- 1 x 4/0AWG Inverter Cable, approx. 2ft
- Fuse and Fuse Holders
- 1 x 15A inline fuse kit, MC4
- 2 x Solar Panel Z-Brackets
- Free System Schematic / Wiring Diagram
Similar: Titan Solar Generator Review – The Best Large Solar Generator?
How Many Watts of Solar Do You Need for a Shed?
A shed typically needs anywhere from 200-1,000 watts of solar panels to effectively charge a battery or batteries for consistent use. The amount of solar panels needed for a shed is dependent on average sunlight conditions as well as daily power consumption needs.
As you increase the solar panel wattage on your shed, you should also make sure that your charge controller is capable of handling the total output from the panels.
I wrote a post about this because it can be confusing to find the right one for your exact setup. The type of controller depends on the number of panels, total wattage, and configuration (series or parallel). I explain all of this in my post and give exact models of controllers you can use. Check out here: What Size Charge Controller Do I Need? (50-400W).
Is It Worth Putting Solar Panels on Your Shed?
It is worth putting solar panels on a shed because they provide free off-grid energy, are low-maintenance, and last for decades. In addition to solar panels, a complete system includes a battery, charge controller, fuse box, and inverter.
Solar installations are quite easy to take care of and require little maintenance.
Still, periodic cleaning of the surface of the solar panels will keep off dirt and dust, which might affect performance. This should be done once a month.
Bottom Line
The Renogy 200-watt 12-volt monocrystalline solar starter kit is a simple, powerful system making it a worthwhile investment of your money.
While it is not a big installation, it is great for off-grid power needs or a periodic substitute for high power bills.
If you want more power, you can install up to 400W of solar panels to your system.
Renogy also has several charge controllers sold separately as well as inside other kits if you’d like to expand your system.
If you’d rather build and install your own custom system instead of a kit like this, I recommend reading my DIY post that’s more “How to Install Off Grid Power for a Shed“. I go over more intricacies of what to look for and how to properly find and install your system.
