After testing my two portable solar panels multiple times (Elecaenta 120W and Nomad 10) I ran into some issues along the way that you may experience when using yours.
This article highlights basic steps in ensuring even the complete novice can find a way to get their portable solar panel working again.
If your portable solar panel isn’t working, it can be due to issues such as insufficient sunlight conditions, incompatible connectors, dirty solar cells, dirty connections, or an internal malfunction.
| Issue | Possible Causes |
|---|---|
| No Power Output | Faulty charge controller, poor sunlight, problematic panel within solar array |
| Low Voltage/Amperage | Poor sunlight, high temperature |
| Poor Cable Connections | Dirty inside connection, incorrect connection piece |
| Hot Spots | Partial shading, dirt/grime build-up |
| Micro-Cracks | Adverse weather (hail, wind, thermal cycles) |
| Panel Stains | Inconsistent cleaning, general outdoor environment |
Depending on your solar panel setup, there are several factors that can cause your solar panel(s) to stop working.
My main aim in this article is to help you narrow down the cause of your specific solar panel malfunction so that you can fix it as fast as possible.
Below I dive deeper into the information from the table and explain each solar panel issue in more detail.
Related: How Long Does It Take a Solar Charger to Charge a Cell Phone?
Why Did My Solar Panel Stop Working?
A solar panel can stop working due to one or more of the following issues: low voltage/amperage, poor cable connections, hot spots (non-performing cells), micro-cracks, panel stains, and/or internal malfunction. These issues mostly come from adverse weather conditions and poor maintenance.
Solar panels are sensitive devices, and by paying attention to the warning signs, you will be able to avert certain problems before they worsen.
Highlighted below are some of the reasons your solar panel may have suddenly stopped working:
- No power output
- Low voltage or amperage
- Poor cable connections
- Hot spots on the panels
- Micro-cracks
- Panel stains
1. No power output
This happens frequently with solar panels and can be caused by a faulty charge controller, poor sunlight, or (for two or more connected panels) a problematic panel in your PV arrangement.
One problematic PV module is enough to shut down your entire solar system since they are all interconnected.
Sometimes a charge controller cannot handle the amount of energy running through it.
This can be checked by using a multimeter to review the solar input section of the charge controller.
Use the multimeter to test for the Vmp (voltage at maximum power) and Imp (current at maximum power). These numbers can be found on the back of your solar panel.
Depending on your solar setup (series or parallel) you will typically either have a higher voltage or higher amperage when using multiple panels together.
For more information on testing for Vmp and Imp (as well as other terms and measurements for solar), check out this post from solar4rvs.com .
.
If you only have one solar panel that doesn’t use a charge controller, the below issues may better suit your situation.
2. Low voltage or amperage output
Some of the major reasons for a low voltage or amperage from a solar panel include shading, temperature, and faults from the solar panel.
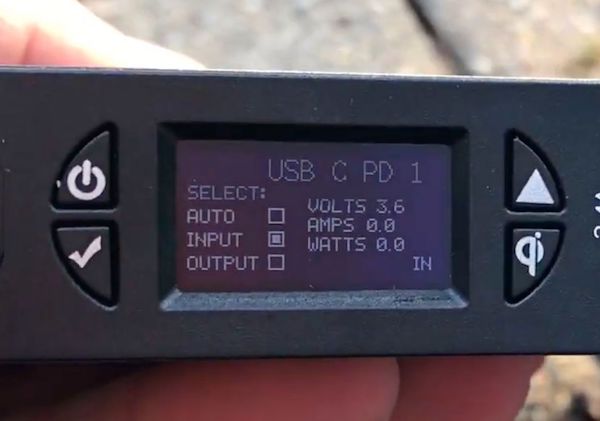
I experienced a low amperage output from my Nomad 10 solar panel when charging my Sherpa 100AC power bank.
I realized that this was due to both sunlight obstructions (trees and branches) and low sunlight conditions (the sun was setting).
In these types of conditions, a larger portable solar panel (20-50W) may have shown at least a few watts coming into the power bank to charge it up; however, I received 3.6 volts and 0.0 amps from my 10W Nomad 10 panel.
This resulted in zero watts coming from my Nomad 10 since no amps were produced.
To test this out for your panel, a multimeter is the best option if you do not have a power bank or a similar device that measures amps and volts.
3. Poor cable connections
Another way a malfunction can occur is from using a poor-quality or incompatible connection.
This happened to me when using my 120W Elecaenta solar panel to charge my Jackery Explorer 300.
The solar panel came with several connector tips to charge different devices (laptops, solar generators, etc.), but when using the connection that fit best into my Jackery, the initial solar input reading was very low (66-67W).
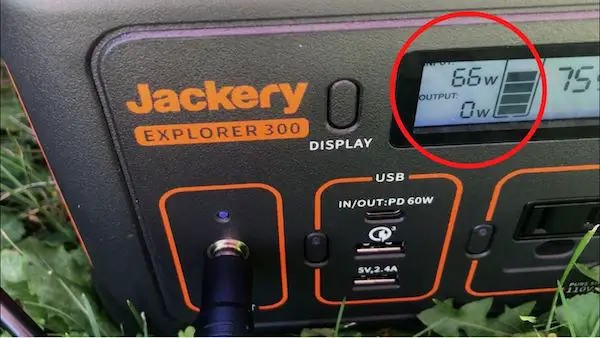
My solar panel seemed to be fine in terms of its placement and the sun conditions were perfect.
I adjusted the panel slightly and removed/inserted the plug a few times before getting a reading of about 84W consistently.
I had this issue happen a second time in a similar fashion: 66-67W initially and then 84-88W after making slight adjustments.
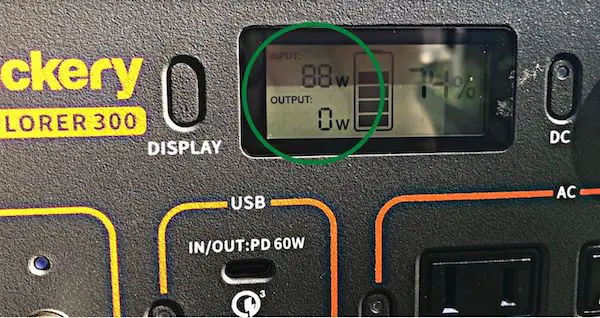
The problem came from the 8mm connector that was provided with the solar panel. It was partially exposed because it didn’t fit fully into the Jackery input.
This resulted in me needing to adjust it to get the perfect connection (or as close to perfect as possible).
Since the Elecaenta is a third-party panel, it did not have the exact same proprietary connector piece as Jackery’s own solar panels.
If you’re using third-party solar panels with a solar generator (or any device) to charge it up, make sure to look out for reviews or forums that confirm that they are compatible or not.
This will save you from constantly needing to make adjustments to get a good connection (like I did).
4. Hot spots on the panels
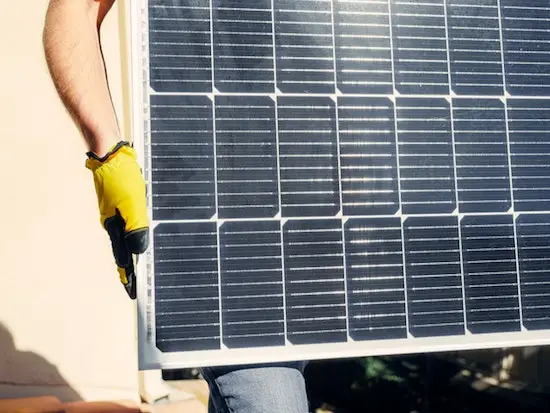
Solar panels generate energy in the form of electricity, which flows through each cell in a panel and out to power your gadgets.
However, electricity flow can be obstructed by a non-performing cell – the result of this is that the excess electricity is transferred elsewhere. In this case, the energy is converted to heat.
This situation is similar to a water pipe, where one section is constricted, the narrow segment will experience higher pressure – and higher pressure is the same as higher temperature!
Hot spots on your solar panel can be caused by a dirty surface which results in one section of the panel receiving full sunlight while the dirty section receives only part of its full potential. Thoroughly cleaning the surface of your panel may bring it back to its full capabilities (output power).
Another way this can happen is from improper sunlight coming to the panel throughout the day.
A way to check this is to observe the panels on a sunny day every 2-3 hours. You want to see if at any time in the day the panel (or panels) are being blocked by trees, bushes, or any other objects.
If only part of one panel is receiving full sunlight at a certain period in the day, this can cause a hot spot to occur.
Either relocating the panel or removing any brush that is in the way can help your panel recover to its full specifications.
If these options don’t work for you and you think it may be an internal error, most solar panels are covered under long warranties. If you believe the issue is internal and not easily fixable, then I recommend calling customer support to get your money back or a replacement panel.
5. Micro-cracks
Micro-cracks in solar cells are a regular and complex task for makers of solar panels.
It is challenging to measure accurately their impact on the overall effectiveness and durability of a solar panel – and they are one of the main sources of faulty or even inactive cells.
However, micro-cracks are virtually difficult to avoid and, in the long run, will distress most solar panels, including high-quality panels.
They are prompted by mechanical, chemical, and environmental factors causing stress to the panel – such as hail, snow, sun fluctuations, wind, and severe coldness.
Stress factors are geared to the thermal cycles of the solar cells involving contracting, expanding and flexing metal contacts, solder, and wire.
This is a complicated problem to fix and will most likely be solved by using your warranty to get the panel (or panels) replaced.
In addition, micro-cracks are much more common in permanent solar installations. If you use a portable solar panel on occasion, then this is probably not the core issue for your malfunction.
6. Panel stains
Panel stains often build up over a long period of time of usage or can occur after using on a single occasion if using a portable solar panel.
My portable solar panels easily get dirty because they use kickstands that I typically put on the ground.
The larger the solar panel is that you use, the easier it is to get stains on it from dirt, grass, leaves, you name it.
Sometimes a layer of dust can accumulate on the solar cells if you use the panel frequently without cleaning it.
Any particles on your panel can reduce its output, but rarely do stains cause the panel to completely stop working.
If your solar panel isn’t performing to its specifications, I’d first clean off the cells and then (if necessary) backtrack from there to see if the low power output has to do with a different issue.
How Do I Know if My Portable Solar Panels Are Working?

Portable solar panels are working properly when their rated open-circuit voltage (Voc) and short-circuit current (Isc) are similar to your own testing using a multimeter. However, Voc changes according to temperature – solar panel voltages will decrease in hot weather and increase in cold weather.
If you are very familiar with solar systems, you might find it easy to detect a faulty solar panel by just observing the performance of your solar system at specific times. There are warning signs that, at first are not big of a deal, but will quickly aggravate into an issue if ignored.
Don’t worry if this is your first experience with a faulty solar panel.
The following tips will show you how to self-diagnose your solar panels. The first two are simple steps and the last one will be more complicated.
I’ll be going over the third step in more detail so you can understand what is required:
- Check for obstructions
- Check the solar panel’s indicator light
- Use a multimeter to test amps and volts
1. Check for obstructions
Some of the things that might obstruct sunlight include:
- Trees, branches, plants, leaves, etc. covering the panel
- Dust and debris that may have settled on the panel overtime
- Placing the solar panel on an uneven surface
2. Check the solar panel’s indicator light
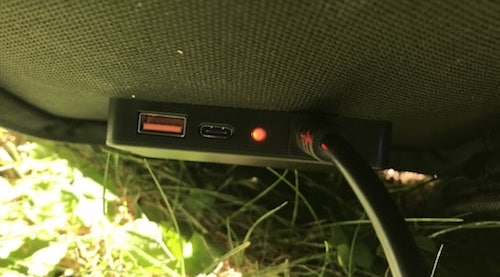
First, check your portable solar panel’s LED indicator light to see if it is producing power.
If it’s not on while attempting to use it and it’s not charging your desired devices, then it’s likely there’s an internal malfunction in the solar panel.
3. Use a multimeter to check amps and volts
Each portable solar panel has an open-circuit voltage (Voc) and short-circuit current (Isc) rating. “Voc” is measured in volts (V), while “Isc” is measured in amps (A).
Open-Circuit Voltage (Voc) – measured in volts (V)
Short-Circuit Current (Isc) – measured in amps (A)
A multimeter will be able to test the amps and volts coming from the solar panel to make sure it is working correctly according to its specifications.
Below I dive into how to test your panel using a multimeter.
CAUTION: Using a multimeter with a solar panel may cause the ground (black) connection to spark and you may hear this as a brief cracking sound. This is a standard procedure and is perfectly normal.
How Do You Test a Portable Solar Panel?
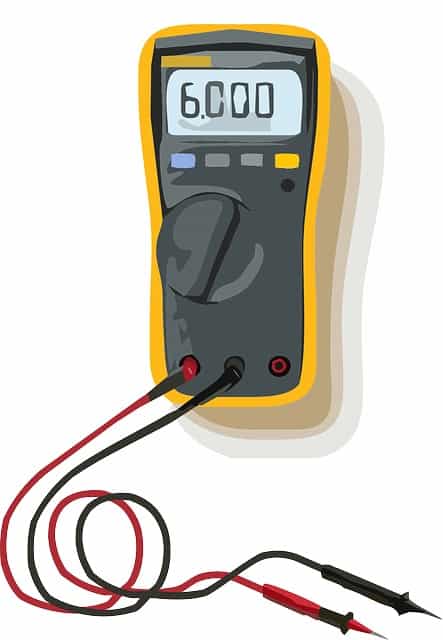
You test a portable solar panel by connecting its leads to a multimeter to measure its open-circuit voltage (Voc) and short-circuit current (Isc) rating. Connect the solar panel and multimeter leads by corresponding polarity – positive (red to red) and negative (black to black).
As stated before, “Voc” is measured in volts (V), while “Isc” is measured in amps (A).
These power ratings are typically found on the back of the panel.
If you can’t find the ratings on the panel, then your user manual is the next place to look for them.
Why Are You Testing Your Portable Solar Panel?
There are two main reasons why you’d test your portable solar panel:
- To make sure it’s compatible with your devices
- To confirm if the panel is working to its specifications
Both the Voc and Isc are the ideal ratings to measure in a portable solar panel because these numbers let you know if your devices can handle the maximum voltage and current coming from the panel.
If you’re using USB ports from the solar panel, you most likely don’t need to worry about testing these ports.
These ports are already programmed to output the correct amount of power for USB charging.
If your panel has a different output connection like an Anderson Powerpole, Aviation plug, or a proprietary plug (ex: Goal Zero and Jackery solar panels), you’ll want to test these connections out.
These types of plugs/connectors are usually found in solar panels that are rated for over 30W.
For example, my Elecaenta 120W solar panel has a main connection including an Anderson Powerpole and Aviation cable mainly for charging portable power stations.
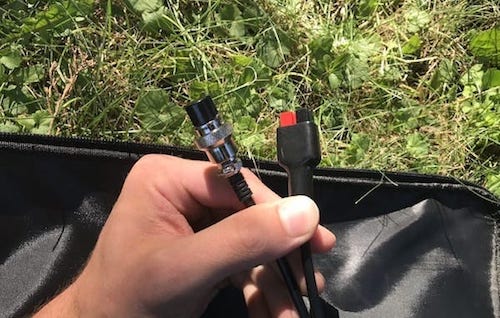
In a portable power station, a charge controller manages the solar panel’s output within a specific range. If you’re using your portable power station to charge from solar, the panel needs to be within the specifications listed for its charging input.
If your panel is too powerful or too weak for your power station, it can either damage your system (too much power) or not power your system at all (the solar panel is too small – low power output).
In the exact same manner, this also applies if you’re using the panel to connect to a charge controller (which then connects to a battery). This is a DIY solar generator setup compared to using a portable power station.
The main idea here is to make sure your charge controller can handle the maximum allowable voltage and amperage delivered from the solar panel.
Important Notes:
- When measuring Voc, as temperatures outside go above 77 degrees Fahrenheit, the panel will produce an increasingly lower average voltage compared to its Voc rating.
- As temperatures continue below 77 degrees, the average voltage will be higher.
This is because every solar panel uses STC, short for Standard Testing Conditions , to measure its power ratings. As you may have assumed, 77 degrees Fahrenheit is the STC for temperature.
- When measuring Isc, temperatures exceeding the STC will typically produce a slightly higher amperage than the listed Isc on the panel
With these facts in mind, you’ll be able to test if your panel is working correctly and if it will be compatible with your portable power station setup.
For a testing example, the video below will show you how to perform this test:
Maintaining Your Portable Solar Panel
I’d like to close with some simple maintenance tips that you can easily do to expand the lifetime of your solar panel.
(And by following these, hopefully, you won’t need to deal with a faulty portable solar panel ever again!)
1. Properly secure the panel when using it
Most panels are strong and durable, but they also are very thin when unfolded.
In addition, the vast majority of portable solar panels are foldable, which can bring some wear to the folding sections after heavy use.
For a long-lasting solar charger, be sure to use buckles, carabiners, zip-ties, or something similar to strap your panel onto your backpack or wherever you intend to place it.
The less it moves when fastened, the better.
2. Avoid water

Although you probably won’t use a portable solar panel in the rain, you may find yourself exposed to it when you’re camping or backpacking.
If you do, make sure to store your panel in a secure part of your backpack or inside your tent.
Most portable solar panels are waterproof on the panel face and some are even completely water-resistant.
That being said, the water resistance rating or IP rating (ex: IP67) is vitally important to understanding how much water a solar panel can tolerate.
Most companies give you a rating like this in their product listing.
Nevertheless, there is a limit to which even the best and the most dependable waterproof solar panel will endure.
3. Clean your panels regularly (solar cells & connectors)
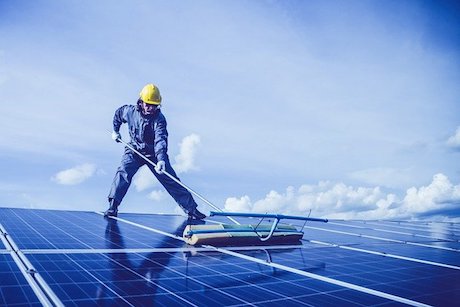
Portable solar panels can get dirty fast depending on how often and in which environments you use them.
It’s best practice to clean the solar panel cells whenever you notice them getting dirty. You can use a sponge or damp paper towel to clean the grime off easily.
On the same note, the connectors on the solar panel should be cleaned with a Qtip or compressed air to remove any particles that can accumulate when used outdoors.
This will not only make the panel work better, but it’ll last longer while maintaining its original performance.
Conclusion
Portable solar panels are always used outdoors, so it’s normal for them to encounter problems that could cause them to develop a fault and stop working properly.
Hopefully, with these easy steps, you can troubleshoot your solar panel and get it working again without needing to call the customer service team.
In addition to portable solar panels, pairing yours with a power bank is an easy way to store extra power when you need it.
Below I have some articles surrounding this topic that show you what features to look for and which ones I personally recommend:
